Discover how to effectively track student viewing history in the Social Emotional Learning Platform.
This guide provides step-by-step instructions for creating student profiles, managing viewing history, and modifying settings to enhance your experience.
Quick Links to Key Sections of this Guide:
Unlocking the Potential of Student Profiles
Step-by-Step Guide to Creating Student Profiles
Customizing Your Student Profile Settings
Easily Modifying the Date Seen on Materials
Unlocking the Potential of Student Profiles
Student profiles are powerful tools that can enhance your educational experience. Here’s how you can leverage them:
- Track Student Viewing History: Gain insights into what materials your students are engaging with.
- Record Viewing Dates: Keep a detailed log of when each material is accessed.
- Generate Printable Reports: Easily print viewing history for assessments and reviews.
- Add Progress Notes: Document important observations and notes for each activity. To learn more, please visit this link.
Step-by-Step Guide to Creating Student Profiles
Creating student profiles is simple! Just follow these easy steps:
- In the blue navigation bar, click on My Toolkit, then select Students and Groups.
- The page will open to the Group's view. Click the Students tab to see your students.
- To add a single student, click the yellow +New Student button.
- Enter the student's first name and last initial when prompted.
- Click Confirm to save the new student profile.
- To add multiple students at once, click the Add Multiple Students button.
- Enter student names in the following format, pressing the enter key after each name:
- Brittany B
- Caleb B
- Selby S
- Click Create Students when you are finished.
- Enter student names in the following format, pressing the enter key after each name:
If you do not see your students right away, you may need to refresh your page.

Customizing Your Student Profile Settings
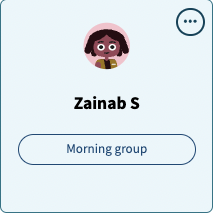
Each student profile has three horizontal dots in the upper right corner. Click on these dots to access a variety of options:
- Edit the Student's Name: Make changes as needed.
- Download Viewing History: Keep a record of student engagement.
- Edit Group Membership: Adjust the groups the student belongs to.
- Delete the Student Profile: Remove profiles that are no longer needed.

Easily Modifying the Date Seen on Materials
To modify the date seen on a material, follow these straightforward steps:
- Click on any student to view their materials.
- Locate the material you want to modify, then click the three horizontal dots to the right of the material.

- Select Modify Date Seen, choose the date from the calendar, and click Save.
Whether you are creating profiles, customizing settings, or updating engagement records, these features empower you to deliver a more personalized learning experience for your students.
As you explore the Social Emotional Learning Platform, remember that these tools are designed to support your educational journey.
For further assistance or to discover additional features, please refer to the resources available within the platform.