
Want to organize your students into a class or group? You can do that with the Add Student to Group feature in My Classroom!
Note: subscribers on our Basic subscription plan will not have the ability to create Group profiles. Those on our Social Communication subscription plan can create unlimited Group Profiles. To upgrade to our Social Communication plan, please see this article.
To learn how to add students to a group, try the interactive tutorial or follow the steps below!
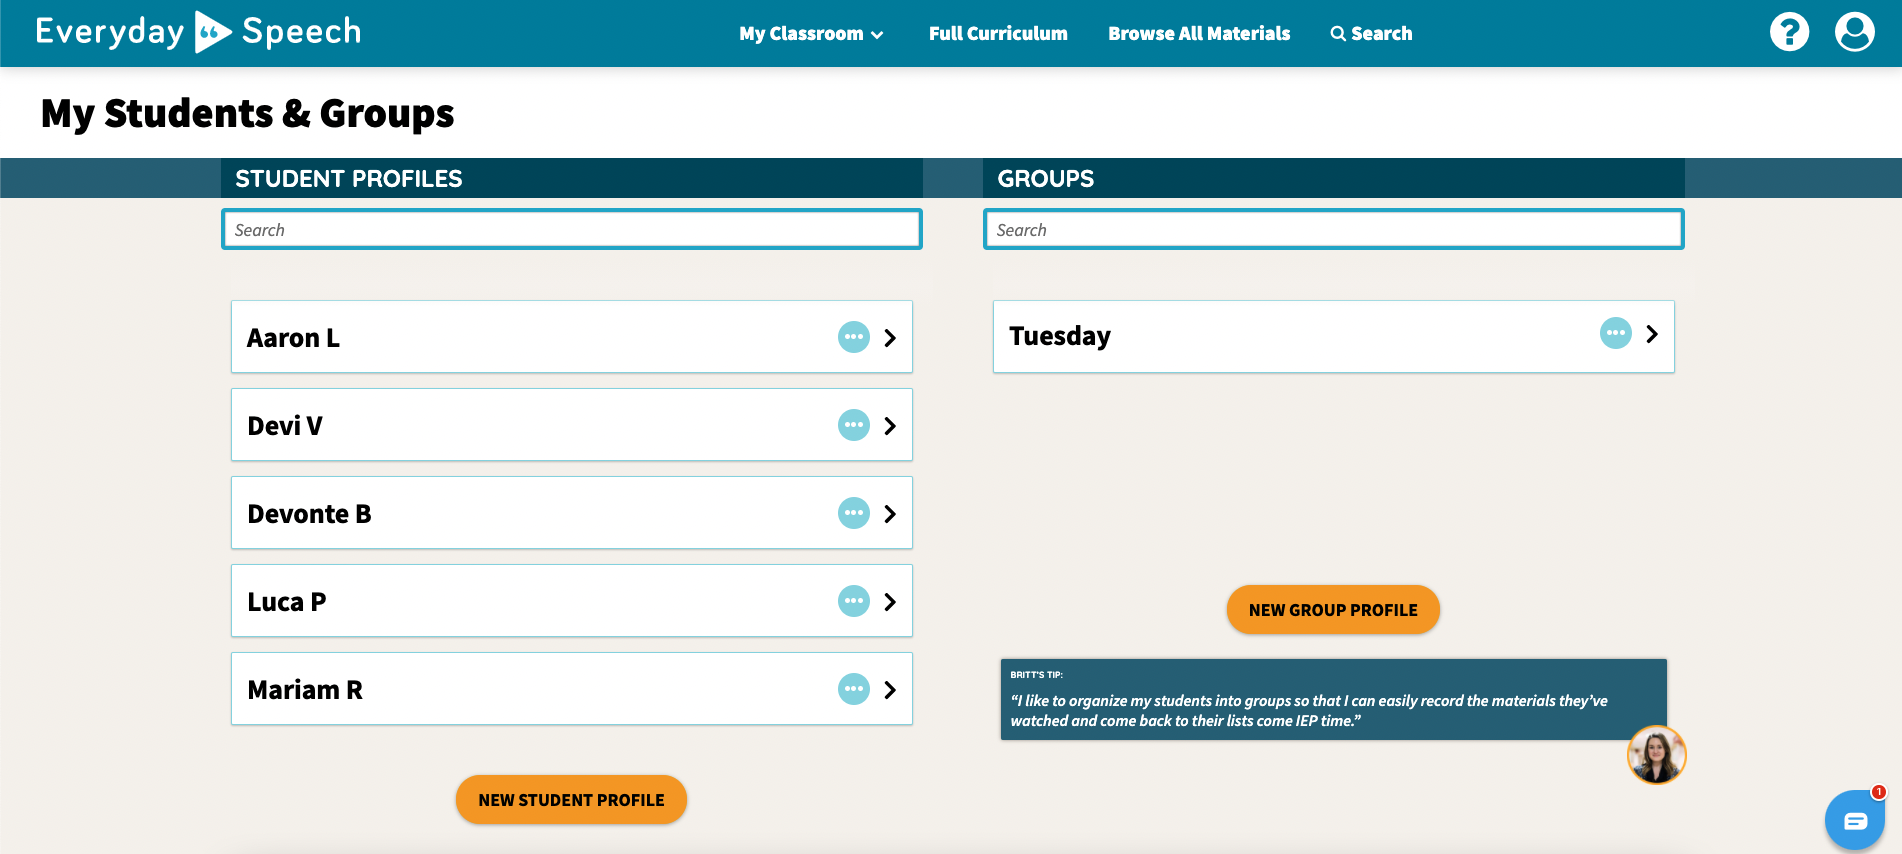
Click on My Classroom on the blue navigation bar, and navigate to My Students & Groups.

This will bring you to the dashboard for your Student and Group Profiles.
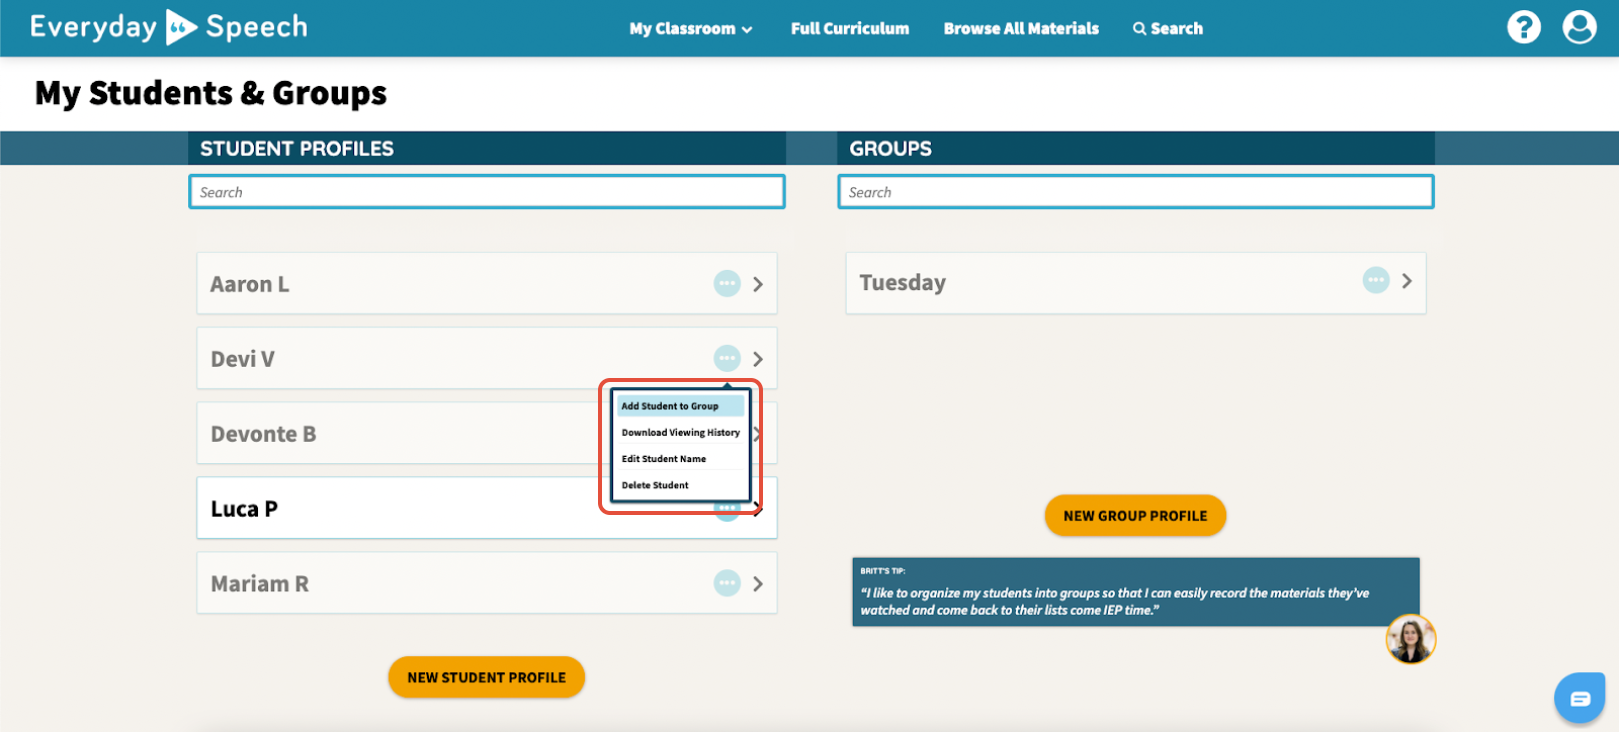
You can add students individually by clicking on the circular option icon next to their name under Student Profiles. Click Add Student to Group.
If you haven’t created any Groups yet, a pop-up will appear prompting you to create a Group:
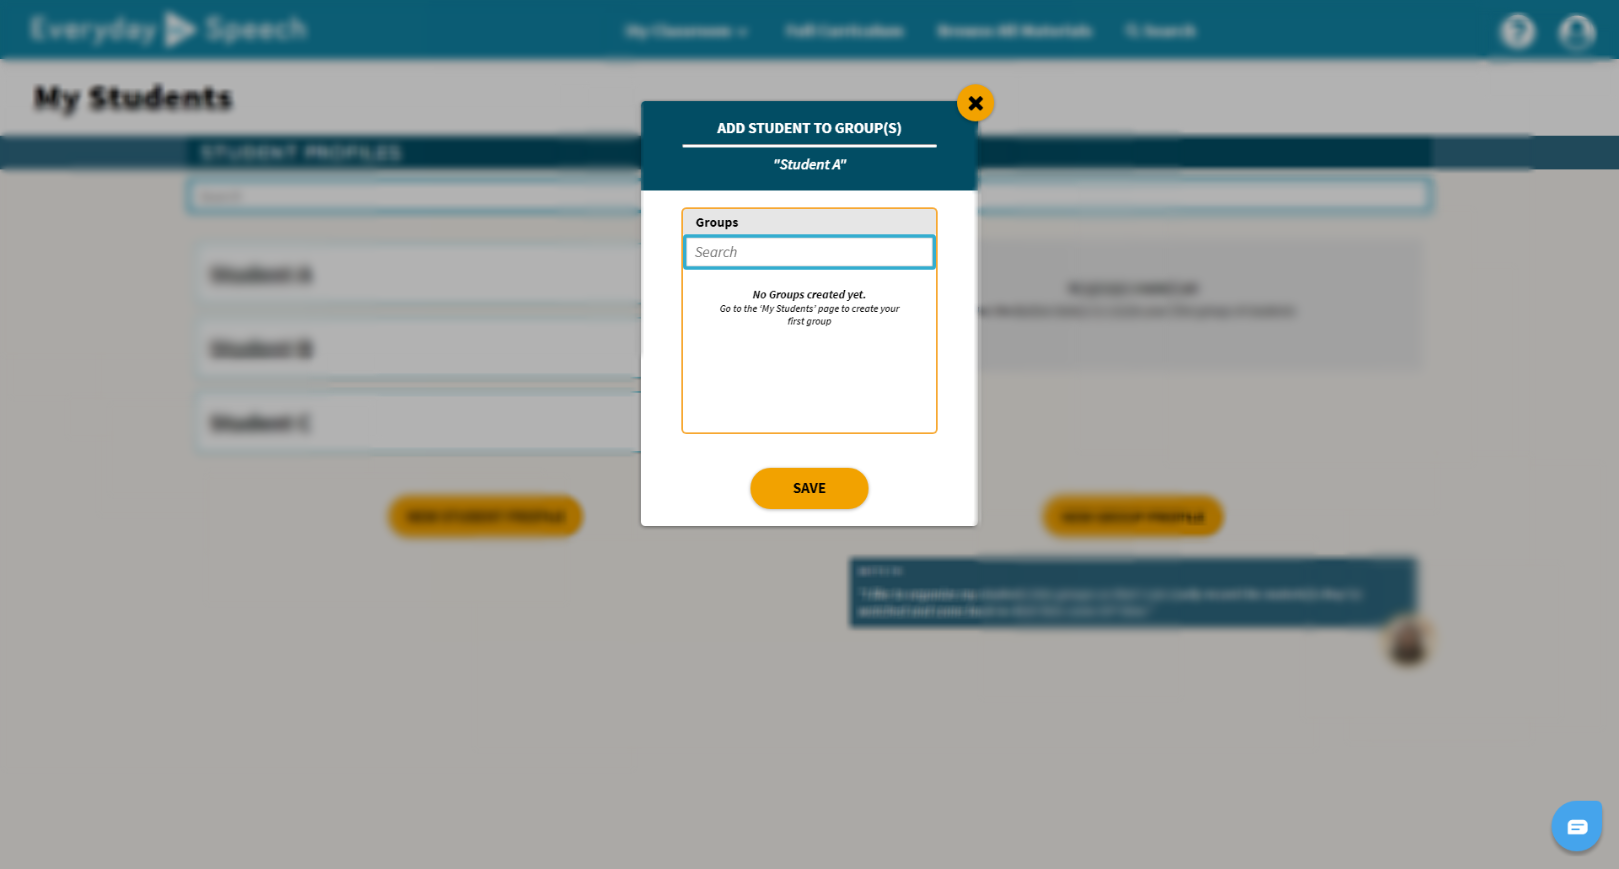
Learn how you can Create a Group Profile.
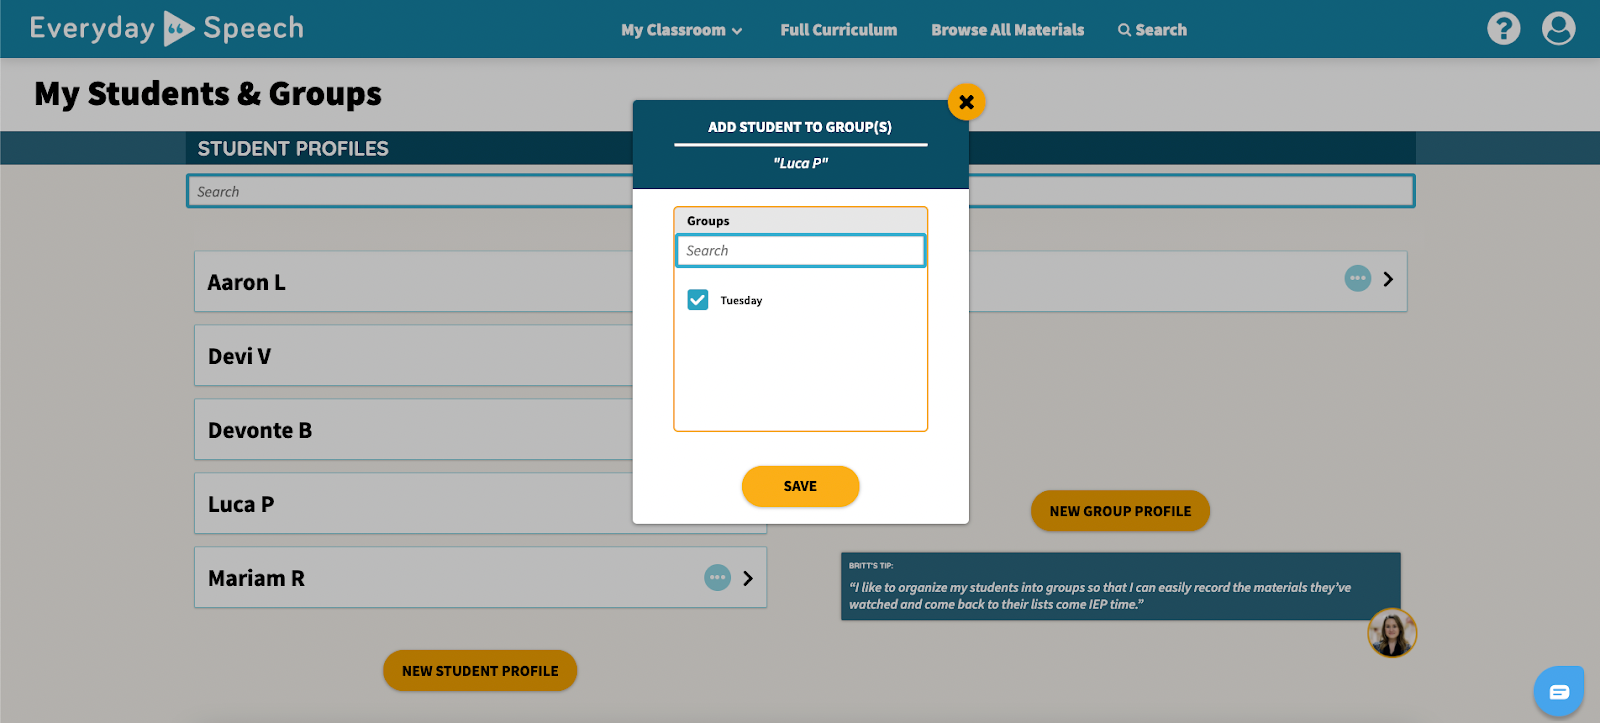
If you’ve already created a Group, select the Group that you want to add the student to. Click Save.
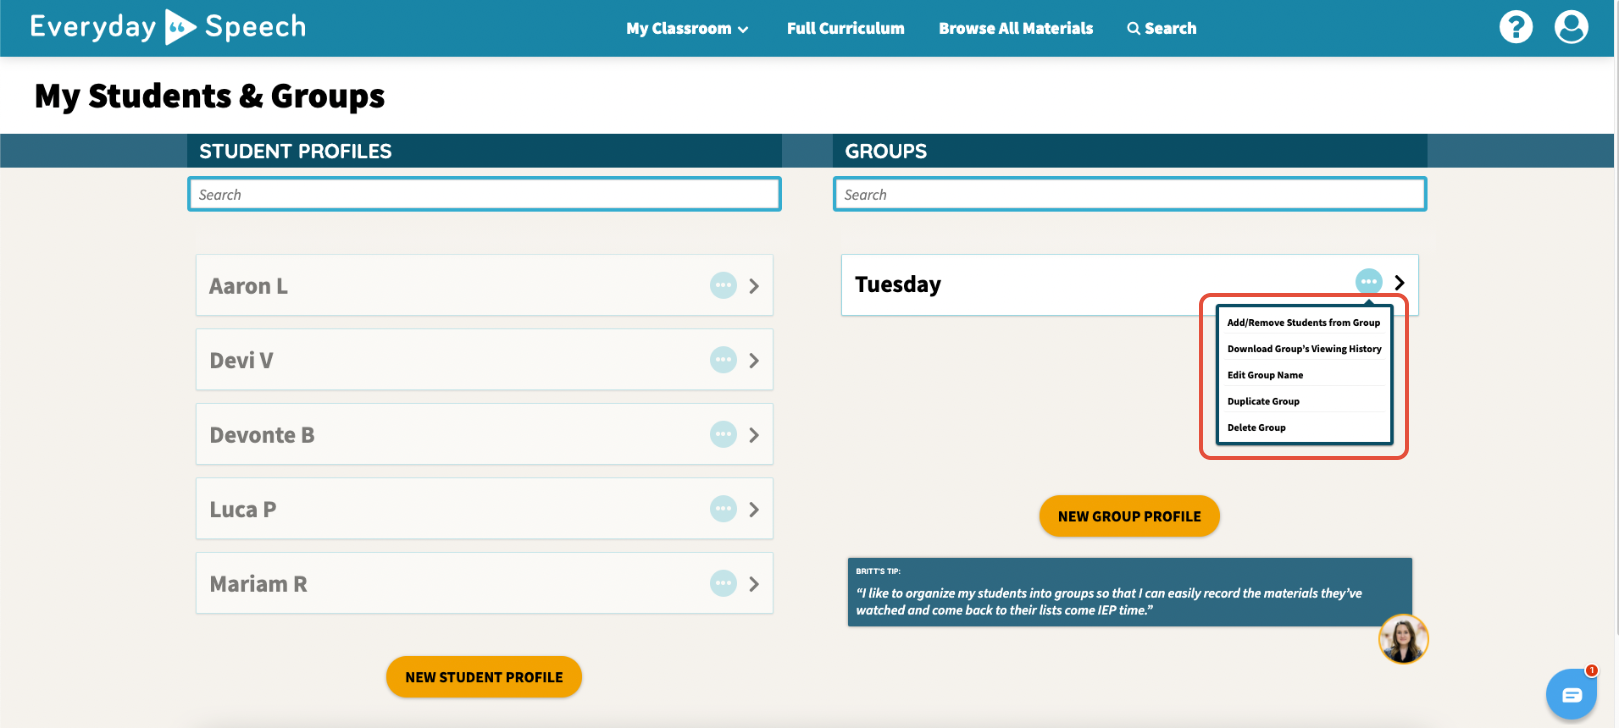
You can also add students to a Group by clicking on the circular option icon beside the Group name.

Click Add/Remove Students from Group.
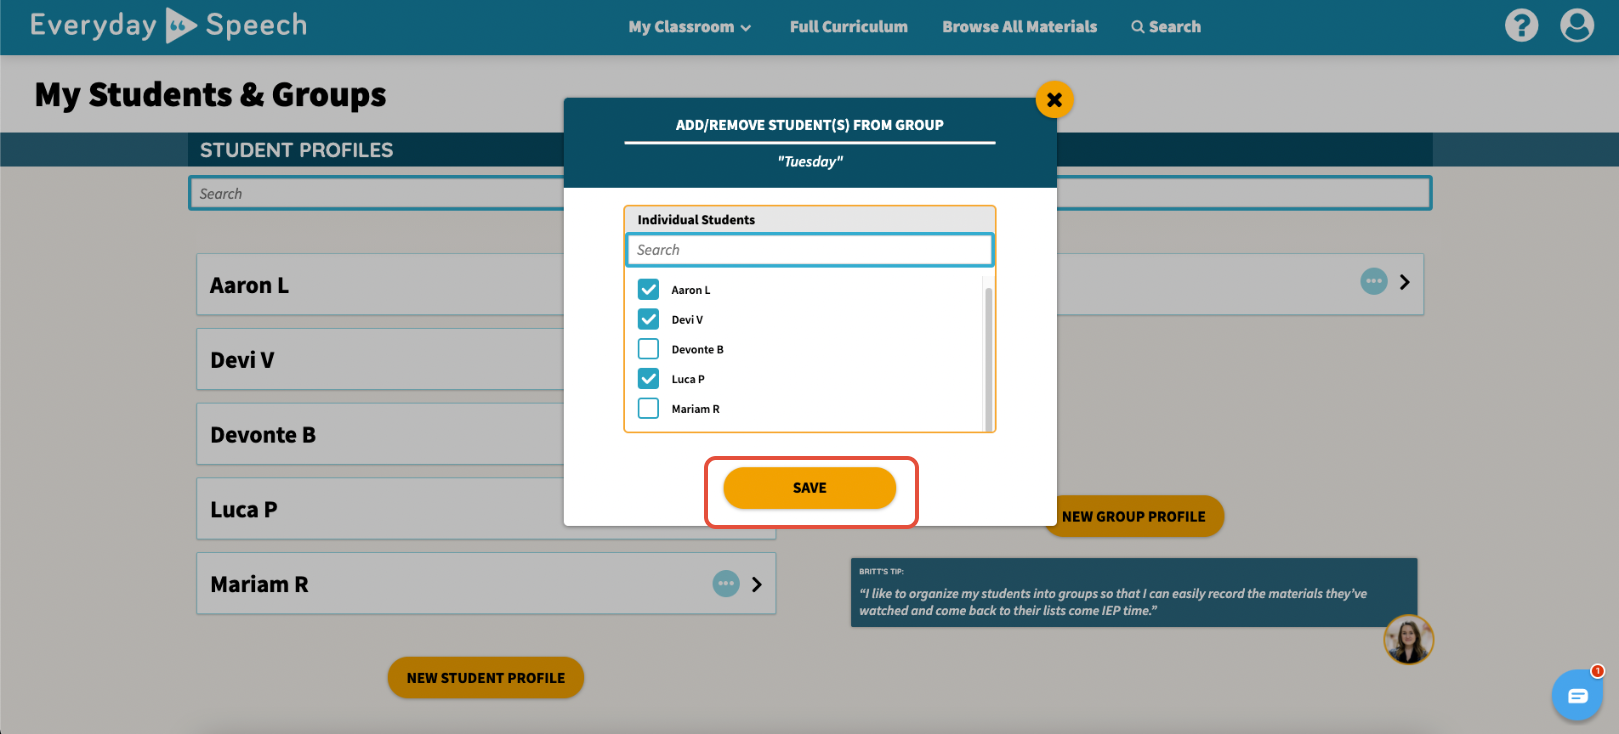
You can individually select each student you want to put in the group, or you can search the student's name in the list. Once you've finished selecting, click Save.
You should now see the students you have assigned to the group!
